
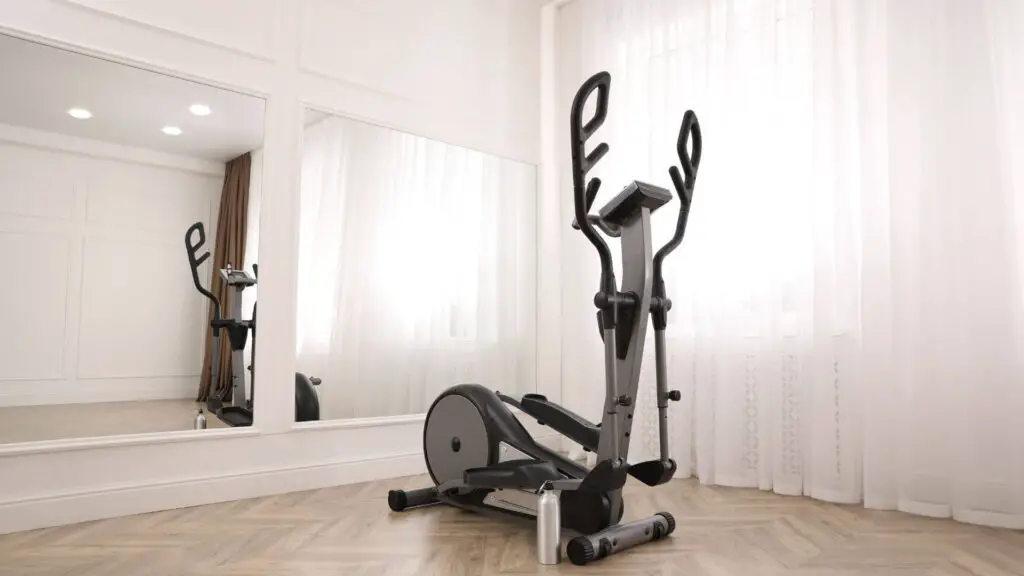
Installing a mirror wall in your home gym can bring numerous benefits, both functional and aesthetic. A mirror wall can provide an expanded view of your space, allowing you to see more of your surroundings and giving the illusion of a larger room. This can be especially helpful if you have a small home gym and want to make the most of the space you have.
A mirror wall can also be a great tool for checking your form during workouts, as it allows you to see your movements from different angles and make any necessary adjustments to your technique. In addition to these functional benefits, a mirror wall can also make your home gym feel larger and more open, as well as add a touch of style and sophistication to the space. If you’re interested in creating a mirror wall in your home gym, here are the steps to follow:
Steps to install home gym mirror
Step 1: Measure the Wall for the Mirror Wall
Accurately measuring the wall where you want to install the mirrors is an important first step in creating a mirror wall in your home gym. To measure the wall, start by determining the width and height of the area you want to cover with mirrors. You may want to use a tape measure or a laser measurer to get precise measurements. Once you have the width and height of the wall, you can then determine the size and number of mirrors you will need to cover the entire area.
It’s important to get the measurements right so that you know exactly how much space you have to work with and can purchase the appropriate size and number of mirrors. This will help ensure that the mirrors fit perfectly and create a seamless, continuous surface when they are installed. It’s also a good idea to double-check your measurements to make sure they are accurate before you make any purchases.
Step 2: Purchase the Mirrors and Additional Materials
When it comes time to purchase the mirrors for your home gym mirror wall, you will have a few different options to choose from. One option is to purchase unframed sheets of glass, which are typically more affordable than pre-framed mirrors. Unframed mirrors are just what they sound like – sheets of glass that are not attached to a frame.
These mirrors will require additional framing to be installed, which can add to the cost and complexity of the project. However, unframed mirrors are often more affordable than pre-framed mirrors, so they can be a good option if you are working on a budget.
Another option is to purchase pre-framed mirrors, which come with a frame already attached. Pre-framed mirrors are typically more expensive than unframed mirrors, but they can make the installation process easier as you won’t need to purchase and install framing separately. Pre-framed mirrors come in a variety of styles and finishes, so you can choose a look that fits your home gym’s decor.
In addition to the mirrors themselves, you will also need to purchase any additional materials you will need, such as framing or mounting supplies. Be sure to carefully review the installation instructions and make a list of everything you will need before you start shopping. This will help ensure that you have all the materials you need on hand and can complete the project without any delays.
Step 3: Clean the Wall for the Mirror Wall
Before you begin installing your mirror wall, it’s important to clean the wall where you will be attaching the mirrors. This will help the mirrors adhere better and ensure a clean, professional-looking installation. To clean the wall, start by removing any dust, dirt, or debris that may be present.
You can use a damp cloth or a mild cleaner to wipe down the wall. Be sure to get into any crevices or corners and remove any cobwebs or other debris that may be present. Once you have thoroughly cleaned the wall, allow it to dry completely before proceeding with the installation. This will help ensure that the mirrors stick securely and that you get the best possible results.
Step 4: Install Framing or Mounting Supplies
Once you have cleaned the wall where you will be installing the mirrors, it’s time to install any framing or mounting supplies you will need. If you are using unframed mirrors, you will need to purchase framing separately and install it according to the manufacturer’s instructions. This may involve attaching the framing to the wall with screws, nails, or adhesive, depending on the specific product you are using. Be sure to carefully follow the instructions provided by the manufacturer to ensure a secure and proper installation.
If you are using pre-framed mirrors, you will need to install mounting brackets or other hardware according to the manufacturer’s instructions. This may involve attaching the brackets to the wall with screws, nails, or adhesive, or using other types of mounting hardware such as toggle bolts or molly screws. Again, be sure to carefully follow the instructions provided by the manufacturer to ensure a secure and proper installation.
Installing the framing or mounting supplies correctly is an important step in creating a mirror wall in your home gym. It’s essential to ensure that the mirrors are securely attached to the wall to prevent them from falling and potentially causing injury or damage. Be sure to take your time and follow the instructions carefully to ensure a safe and successful installation.
Step 5: Install the Mirrors
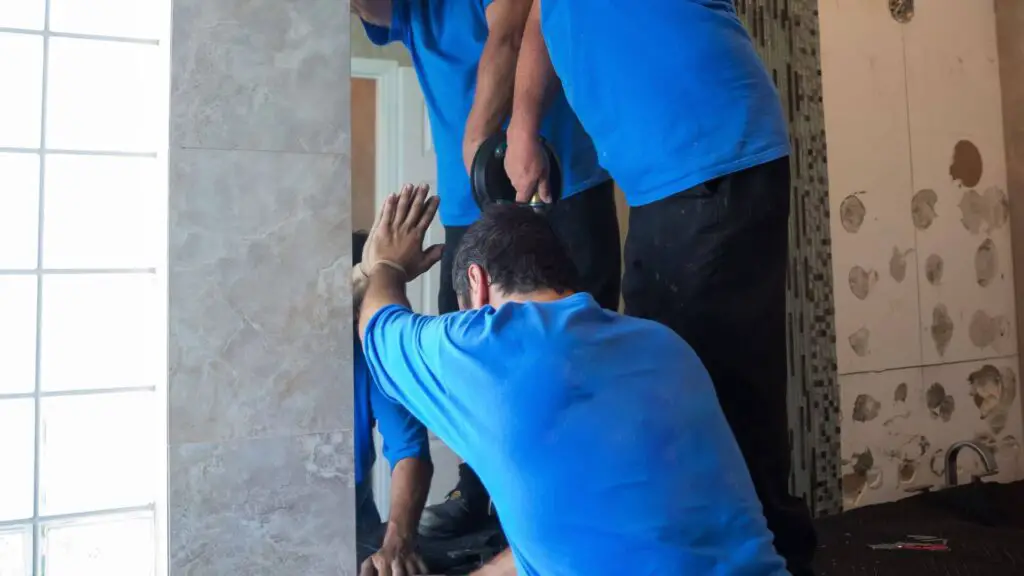
Once you have installed the framing or mounting supplies, it’s time to carefully place the mirrors into position. This is an important step, as it’s essential to ensure that the mirrors are level and securely attached to the wall. To begin, carefully lift the mirrors and place them into the framing or onto the mounting brackets.
Be sure to handle the mirrors carefully to avoid damaging them or accidentally breaking them. Once the mirrors are in place, use a level to ensure that they are straight. If the mirrors are not level, you may need to adjust the framing or mounting brackets to get them into the correct position.
Once the mirrors are level, use mounting hardware or adhesive as needed to secure them in place. This may involve using screws, nails, or adhesive to attach the mirrors to the framing or mounting brackets. Be sure to follow the manufacturer’s instructions for attaching the mirrors to ensure a secure and proper installation. If you are using adhesive, be sure to follow the manufacturer’s instructions for drying times and allow the adhesive to cure fully before using the mirrors.
Taking the time to carefully place the mirrors and ensure that they are level and securely attached is essential to creating a successful mirror wall in your home gym. It’s worth taking the time to get this step right to ensure that your mirror wall looks professional and functions as intended.
Step 6: Align the Seams Between the Mirrors
If you are installing multiple mirrors to create your mirror wall, it’s important to align the seams between the mirrors as closely as possible. This will give the appearance of a seamless, continuous mirror surface, rather than a series of individual mirrors. To align the seams between the mirrors, start by measuring the distance between the edges of the mirrors. You may want to use a tape measure or a ruler to get precise measurements.
Once you have the distance between the edges of the mirrors, use a straight edge or a level to draw a line between the mirrors to mark where the seam should be. You may want to use a pencil or a light-colored marker to make the line visible but easy to erase.
After this, Once you have marked the seam between the mirrors, use a fine-tipped marker or a thin strip of masking tape to mark the exact center of the seam. This will help you get the seam as close to the center as possible and create a clean, professional-looking installation. You may want to use a level to ensure that the seam is straight and that the mirrors are level with each other. If necessary, adjust the mirrors until they are aligned and level.
Taking the time to align the seams between the mirrors will help ensure that your mirror wall looks professional and creates the desired seamless, continuous appearance. It’s worth taking the time to get this step right to ensure that you are happy with the final result.
Step 7: Seal the Edges of the Mirrors
After you have installed the mirrors and aligned the seams between them, you may want to seal the edges of the mirrors to protect them from moisture. This is especially important if you are installing the mirrors in a high-humidity environment, such as a bathroom or a home gym. Moisture can cause the edges of the mirrors to corrode or become discolored over time, which can ruin the appearance of your mirror wall. To prevent moisture from getting between the mirrors and the wall, you can use caulk or clear silicone to seal the edges of the mirrors.
To seal the edges of the mirrors, start by applying a small bead of caulk or silicone along the edge of the mirrors, taking care to fill in any gaps or seams. Use a smooth, continuous motion to apply the caulk or silicone and try to create a smooth, even bead. Once you have applied the sealant, smooth it out with a finger or a tool to create a smooth, seamless finish. Be sure to follow the manufacturer’s instructions for drying times and allow the sealant to cure fully before using the mirrors.
Sealing the edges of the mirrors can help to protect them from moisture and keep them looking their best over time. It’s a simple step that can go a long way towards ensuring that your mirror wall stays looking great for years to come.
Ensuring Secure Attachment for Heavy Mirrors in a Home Gym
If you are using heavy mirrors for your home gym mirror wall, it’s important to ensure that the mirrors are securely attached to the wall. Heavy mirrors can put a lot of strain on the wall, especially if they are not installed properly. If the mirrors are not securely attached, they could fall and potentially cause injury or damage. To ensure that the mirrors are securely attached, you may need to reinforce the wall with additional framing or use special mounting brackets.
If you are installing the mirrors on a drywall or plaster wall, you may need to use additional framing to support the weight of the mirrors. This may involve attaching additional framing to the wall with screws, nails, or adhesive, depending on the specific product you are using. Be sure to follow the manufacturer’s instructions for attaching the framing to ensure a secure and proper installation.
Alternatively, you may need to use special mounting brackets or other hardware to support the weight of the mirrors. These brackets are designed to distribute the weight of the mirrors evenly across the wall, reducing the strain on any one spot. Be sure to follow the manufacturer’s instructions for installing the brackets to ensure a secure and proper installation.
Reinforcing the wall or using special mounting brackets is especially important if you are installing the mirrors on a drywall or plaster wall, as these types of walls may not be able to support the weight of heavy mirrors. By taking the time to properly support the mirrors, you can ensure that they are securely attached and avoid any potential accidents or injuries.
Related Topic: 5 Mirror Ideas to Transform Your Home Gym into a Reflective Oasis
Tips for building a cheap mirror walL
- Use unframed mirrors: Unframed mirrors are typically more affordable than pre-framed mirrors, so they can be a good option if you are trying to save money.
- Shop around: Prices for mirrors can vary widely, so it pays to shop around to find the best deal. Look for sales or discounts at home improvement stores, or consider shopping online for even more options.
- Use a smaller size: Larger mirrors can be more expensive, so using smaller mirrors may be a more budget-friendly option.
- Use a different material: Mirrors made from materials other than glass, such as acrylic or plastic, may be more affordable.
- Consider purchasing used mirrors: You may be able to find used mirrors at a lower price, either online or at a thrift store or garage sale. Just be sure to check the condition of the mirrors before purchasing to ensure they are in good shape.
- Do it yourself: Installing the mirrors yourself can save you money on labor costs. Be sure to carefully follow the manufacturer’s instructions and take your time to ensure a successful installation.
Frequent Question and Answers
How do you hang a gym mirror without glue?
There are a few different ways to hang a gym mirror without using glue:
- Use mirror mounting clips: These clips are specifically designed for hanging mirrors and can be easily attached to the back of the mirror using screws. The clips then attach to the wall, holding the mirror securely in place.
- Use picture hanging wire: This method involves attaching a wire to the back of the mirror using screws or adhesive strips. The wire is then looped over nails or picture hangers on the wall, holding the mirror in place.
- Use adhesive strips: Adhesive strips, such as Command strips, can be used to hang a mirror without damaging the wall. Simply follow the manufacturer’s instructions to attach the strips to the back of the mirror and then press the mirror onto the wall.
- Use a mirror hanging kit: Mirror hanging kits typically include everything you need to hang a mirror, including mounting brackets, screws, and instructions. Follow the instructions included with the kit to hang the mirror securely on the wall.
- Use suction cups: Suction cups can be used to hold a mirror in place on a smooth, non-porous surface, such as a tile or glass wall. Just make sure the suction cups are strong enough to support the weight of the mirror.
Regardless of which method you choose, it is important to make sure that the wall is sturdy enough to support the weight of the mirror and that the mirror is hung at the appropriate height for your workouts.
How high off the ground should a gym mirror be?
The height at which you hang a home gym mirror will depend on the specific exercises you will be doing in front of it and your own height. In general, it is best to hang the mirror at a height that allows you to see your entire body while standing in front of it. This will typically be at eye level or slightly above.
If you will be using the mirror for weightlifting or other exercises that involve standing on a raised surface, such as a step or bench, you may need to hang the mirror slightly higher to accommodate the additional height.
Overall, the key is to find a height that allows you to see your entire body while performing exercises, so you can check your form and technique.
Conclusion
A mirror wall in a home gym can provide a number of benefits. It can help you to properly align your form while performing exercises, allowing you to ensure that you are using proper technique and avoiding injury. Additionally, a mirror wall can create the illusion of a larger space, making your home gym feel more open and spacious.
It can also serve as a form of motivation, allowing you to watch your progress and see the results of your hard work. Overall, a mirror wall can be a useful addition to any home gym, helping you to get the most out of your workouts.